6.9 KiB
Getting Hands-On with HashiCorp Vault
A quick note to thank Bryan for the opening aspects of this Secrets Management section, @MichaelCade1 here to wrap things up and get some hands-on scenarios so that we can get some practical touch points and scenarios with HashiCorp Vault.
A lot of what I will cover here can be found in existing HashiCorp Tutorials These resources from HashiCorp will go into a lot more different scenarios as well.
HashiCorp Vault CLI
The first thing I want to walk through is getting the HashiCorp Vault CLI installed on our local machine. We have a great walkthrough from HashiCorp on getting the CLI installed on your local machine.
I am on my MacOS device but other instructions are also shown in the above link.
brew tap hashicorp/tap
brew install hashicorp/tap/vault
Now when you run the vault command you should have access to the vault binary and sub commands.

Getting Vault up and running on Kubernetes
If you have been following along to any other sections in this project you will likely have seen that I am a big fan of Minikube when it comes to getting a local Kubernetes cluster up and running for learning or local development purposes.
Vault is not exclusive in anyway to Kubernetes but I wanted to cover this scenario, HashiCorp also have a cloud SaaS option for Vault but it can be deployed many places.
I use the below command to get my minikube up and running, you could just use minikube start but this is my go to for other demonstrations.
minikube start --addons volumesnapshots,csi-hostpath-driver --apiserver-port=6443 --container-runtime=containerd -p demo --kubernetes-version=1.26.0
Now we have our cluster hopefully up and running, we will now use helm to deploy vault to our cluster. A quick google for helm installation steps will provide you with the how to make that happen. If you are on macos though then you can use homebrew to install
brew install helm
Add the Hashicorp helm repo.
helm repo add hashicorp https://helm.releases.hashicorp.com
There are several options and charts available to us within the repository, by running helm search repo hashicorp you will find the available hashicorp products and charts.

For the rest of this walkthrough we will be taking this tutorial However we are going to be deploying vault to a dedicated namespace vs the default namespace.
We will first create this file using the following command.
cat > helm-vault-raft-values.yml <<EOF
server:
  affinity: ""
  ha:
    enabled: true
    raft:
      enabled: true
EOF
I have added this file to a folder called day39 in the repository.
We will use the following command now to deploy vault using helm.
helm install vault hashicorp/vault --namespace vault --values helm-vault-raft-values.yml --create-namespace
By running kubectl get pods -n vault you should see the below output, it is expected to see the 3 pods in a 0/1 running state we are going to work through this next.

Next we will initialise vault-0 with the following command,
"This command generates a root key that it disassembles into key shares -key-shares=1 and then sets the number of key shares required to unseal Vault -key-threshold=1. These key shares are written to the output as unseal keys in JSON format"
kubectl exec vault-0 -n vault -- vault operator init \
    -key-shares=1 \
    -key-threshold=1 \
    -format=json > cluster-keys.json
We can then display the unseal key with jq again on macos if you want to get that installed you can do this with brew install jq
On your local machine you will now see a file called cluster-keys.json. The command to display the key is:
jq -r ".unseal_keys_b64[]" cluster-keys.json
The output should look like this,

We will then create a variable based on that key
VAULT_UNSEAL_KEY=$(jq -r ".unseal_keys_b64[]" cluster-keys.json)
We can then go ahead and unseal our vault-0 pod with the following command:
kubectl exec vault-0 -n vault -- vault operator unseal $VAULT_UNSEAL_KEY
This should display
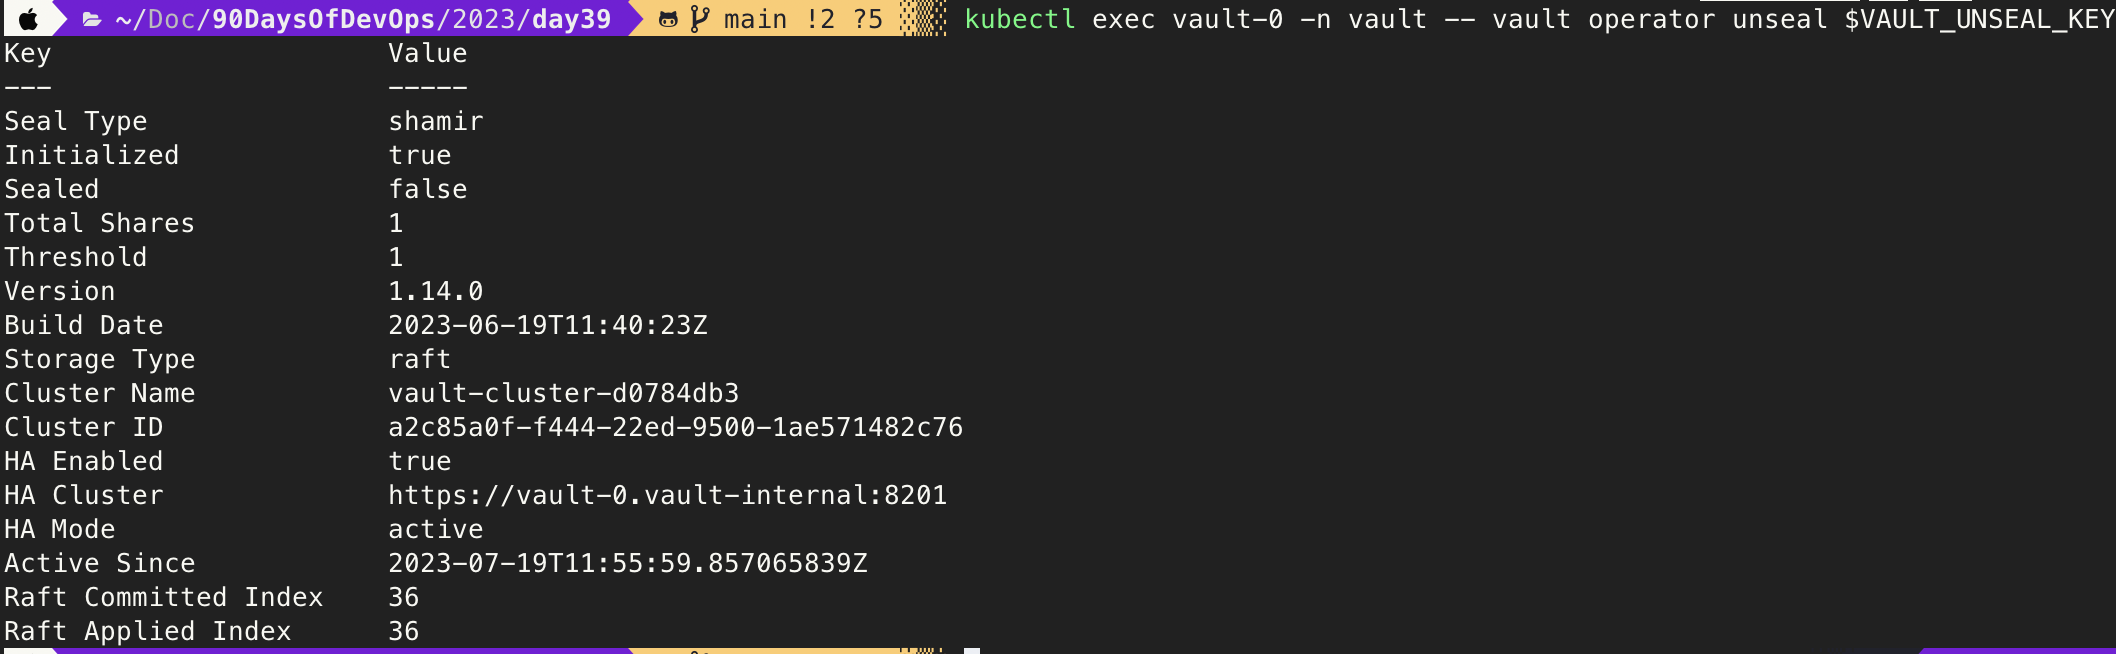
At this stage if you run kubectl get pods -n vault you should now see the vault-0 pod in a 1/1 running state.
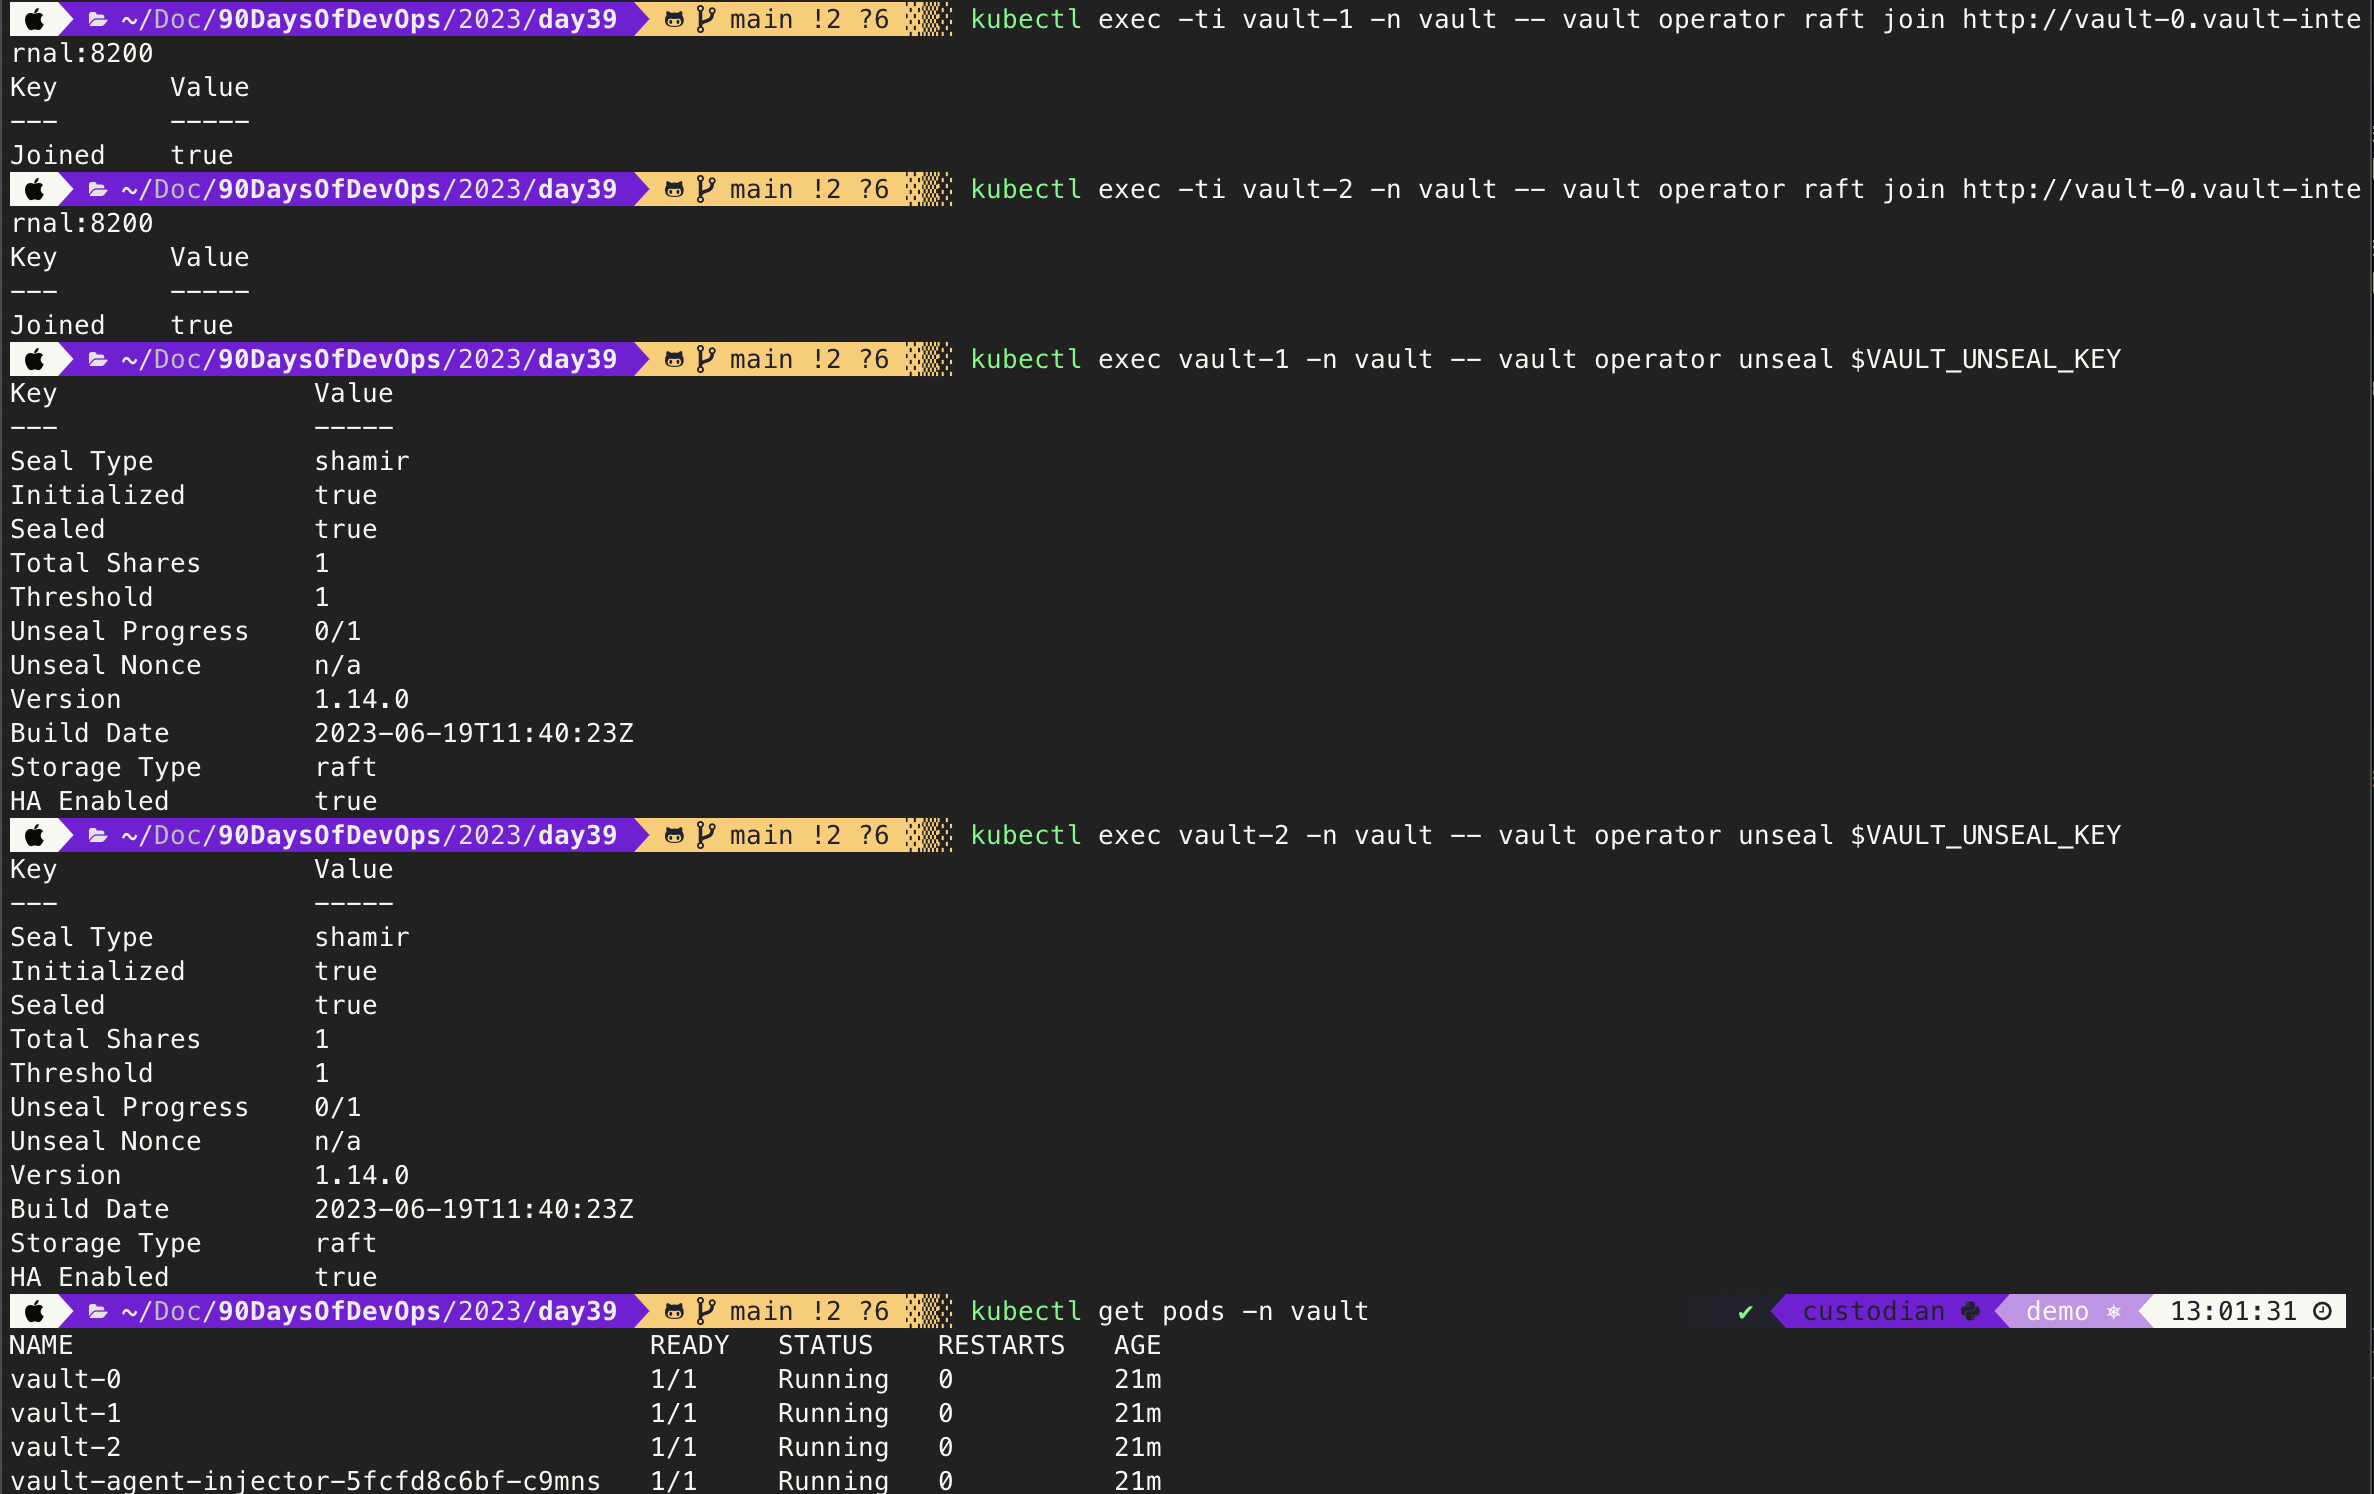
We will now join our other two pods vault-1 and vault-2 to our raft cluster using the following command.
kubectl exec -ti vault-1 -n vault -- vault operator raft join http://vault-0.vault-internal:8200

kubectl exec -ti vault-2 -n vault -- vault operator raft join http://vault-0.vault-internal:8200
We can now unseal the two vault pods mentioned above with the following command.
kubectl exec vault-1 -n vault -- vault operator unseal $VAULT_UNSEAL_KEY

kubectl exec vault-2 -n vault -- vault operator unseal $VAULT_UNSEAL_KEY
Take another look at the kubectl get pods -n vault command. Below is an output of all the recent commands.
Enable Key-Value secret engine
In order for us to enable the secret engine we need to use the root token. This was also exported to the cluster-keys.json file we saw and used earlier for our unseal keys. If not following along you can see this JSON file in the day39 folder.
jq -r ".root_token" cluster-keys.json
We must now exec into our vault-0 pod to enable the secret engine.
kubectl exec --stdin=true --tty=true vault-0 -n vault -- /bin/sh

vault secrets enable -path=secret kv-v2
vault kv put secret/devwebapp/config username='giraffe' password='salsa'
vault kv get secret/devwebapp/config
vault auth enable kubernetes
vault write auth/kubernetes/config \
    kubernetes_host="https://$KUBERNETES_PORT_443_TCP_ADDR:443"
vault policy write devwebapp - <<EOF
path "secret/data/devwebapp/config" {
  capabilities = ["read"]
}
EOF
vault write auth/kubernetes/role/devweb-app \
        bound_service_account_names=internal-app \
        bound_service_account_namespaces=default \
        policies=devwebapp \
        ttl=24h
exit
kubectl create ns webdevapp
kubectl create sa internal-app -n devwebapp
cat > devwebapp.yaml <<EOF
---
apiVersion: v1
kind: Pod
metadata:
  name: devwebapp
  labels:
    app: devwebapp
  annotations:
    vault.hashicorp.com/agent-inject: "true"
    vault.hashicorp.com/role: "devweb-app"
    vault.hashicorp.com/agent-inject-secret-credentials.txt: "secret/data/devwebapp/config"
spec:
  serviceAccountName: internal-app
  containers:
    - name: devwebapp
      image: jweissig/app:0.0.1
EOF
kubectl create -f devwebapp.yaml -n devwebapp
kubectl get pods -n devwebapp
kubectl exec --stdin=true --tty=true devwebapp -n devwebapp -c devwebapp -- cat /vault/secrets/credentials.txt